How do I import transactions from a QIF, OFX, QFX, QMTF, or CSV file?
If you are just getting started with iBank and want to begin by using the transactions you have stored in a file, create a new iBank document, choose the option to "Import from Other Software," and follow the prompts to choose the file you want to use to set up your accounts. If you have already set up your accounts in iBank and want to add some transactions from a file, choose File > Import and select the file you want to import.
Assign column labels (CSV only)
If you choose a CSV file, iBank will prompt you to assign labels to each column of data contained in the file:
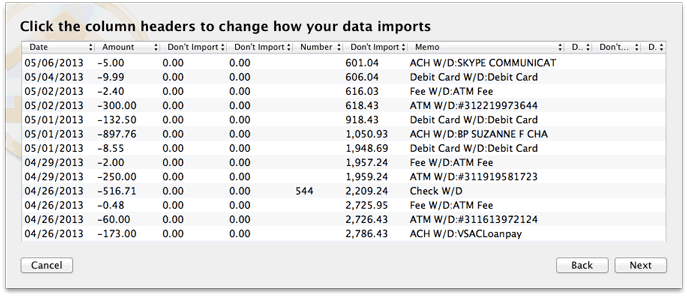
Click and drag the edges of the window to make it large enough to see all the columns. Click the heading above each column and choose a label for the data contained in that column. Any columns that are not assigned a label will not be imported. Note that some CSV files use two columns for transaction amounts - in this case, be sure to assign the "Withdrawal" and "Deposit" labels appropriately. For CSV files that only use one column for transaction amounts, assign the "Amount" label to that column. Once you have assigned labels to all relevant columns, click "OK" to continue.
iBank can only import standard banking transactions from CSV files; split transactions and investments cannot be imported from this file type. CSV files that use commas or semicolons as the delimiter are accepted.
Clarify transaction dates (QIF/QMTF/CSV only)
If the file you are importing uses the QIF, QMTF, or CSV format, and the dates in the file are ambiguous, iBank will prompt you to choose the correct date format before proceeding.
Choose destination account(s)
If the import file only contains transactions from one account, you will be shown a popup menu button to let you choose which iBank account the transactions should be saved to. If the file contains more than one account, you will be shown a list of all the available accounts:
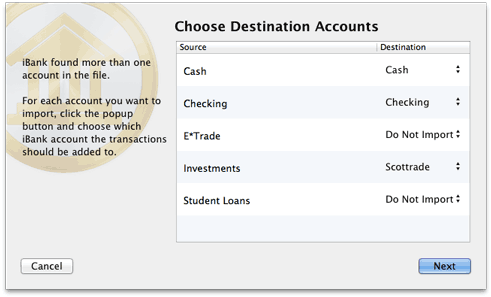
For each account shown in the list, click the popup button next to its name and choose which iBank account its transactions should be saved to. If you don't want to save transactions from a particular account, set its destination to "Do Not Import." Click "Next" to proceed. iBank will import the transactions and save them in the account(s) you specified.
During the import, iBank will automatically screen out any duplicate transactions, mark all transactions "cleared" that were either imported or matched to incoming transactions, and apply import rules to clean and categorize the incoming transactions. A number will appear next to each account in the source list to show you how many transactions were imported. To review the results of the import, see Using the Resolve View.
Merge duplicate transactions
To merge transactions from two different sources (for example, combining an imported transaction with one that was posted from a scheduled transaction), simply drag and drop one transaction onto the other. The resulting merged transaction will contain the details of the transaction onto which the other was dropped. To view the details of a transaction as they were originally imported, prior to matching, import rule processing, and manual merging, select the transaction and choose Transaction > Show Original Import Info.
Set file associations (optional)
The Finder has the ability to associate certain types of files with specific applications. If you want iBank to automatically recognize the files you download from your bank's website (or bring in from another source), you can tell the Finder to associate them with iBank:
- In the Finder, select a QIF, OFX, QFX, QMTF, or CSV file and choose File > Get Info.
- In the window that appears, click the small disclosure triangle next to "Open With" to view the options in that section.
- Click the pop-up button and select "iBank 5" from the list to set it as the default application for that file.
- Click "Change All" to associate all files of that type with iBank.
From that point forward, any time you double-click a file with that type, it will automatically open iBank and begin an import.
After associating the file type using the steps above, you can set your web browser to automatically open files of that type after they are downloaded. This will allow you to download and begin importing new transactions into iBank with one click from your bank's website! Of course, this is not necessary if you use iBank's built-in web browser.